 |
|
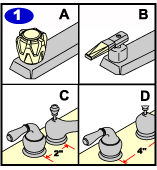
If you are replacing a cartridge in faucet type A continue to step 2a.
If you are replacing a cartridge in faucet type B continue to step 3a.
If you are replacing a cartridge in faucet type C continue to step 4a.
If you are replacing a cartridge in faucet type D continue to step 5a.
|
|
|
|
Disassembly
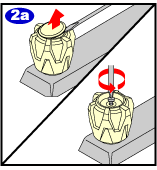
To remove the cartridge from your faucet assembly, first use a flat-headed screwdriver to carefully pry the cover from the handles. Using a Philips screwdriver, unscrew the handle screws and pull the handles off from the faucet assembly.
|
 |
|
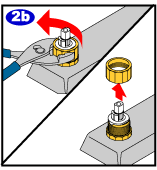
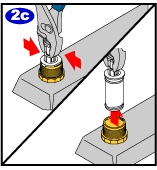
Then, loosen and remove the nut from the cartridge using pliers.
|
 |
|
Cartridge Removal
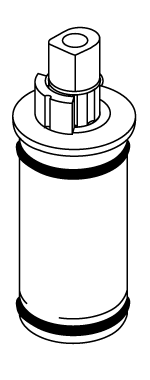
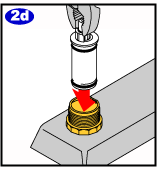
You are now ready to remove the old cartridge. With pliers, grasp the cartridge stem and pull it directly up out of the valve assembly.
|
 |
|
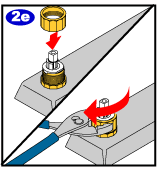
Discard the old cartridge and insert the new cartridge into the valve assembly. Make certain that the notches line up as indicated.
|
 |
|
Cartridge Reassembly
Reattach the nuts to the valve assemblies and tighten them with pliers.
|
 |
|
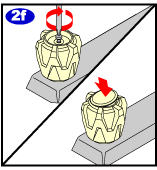
Replace the handles and secure them with the screws. Finally, snap-on the handle covers to the top of the handles.
|
 |
|
Disassembly
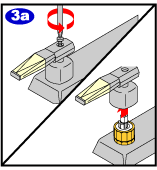
To remove the cartridge from your faucet assembly, first use a Philips screwdriver to unscrew the handle screws and pull the handles off of the faucet assembly.
|
 |
|
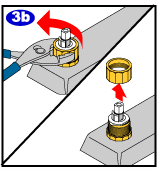
Then, loosen and remove the nut from the cartridge using pliers.
|
 |
|
Cartridge Removal
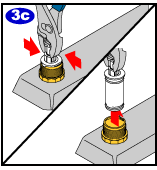
You are now ready to remove the old cartridge. With pliers, grasp the cartridge stem and pull it directly up out of the valve assembly.
|
 |
|
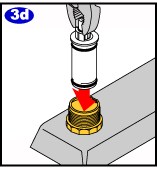
Discard the old cartridge and insert the new cartridge into the valve assembly. Make certain that the notches line up as indicated.
|
 |
|
Cartridge Reassembly
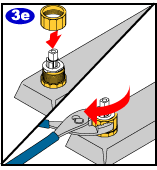
Reattach the nuts to the valve assemblies and tighten them with pliers.
|
 |
|
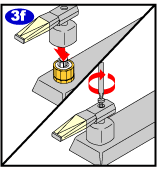
Finally, replace the handles and secure them with the screws.
|
 |
|
Disassembly
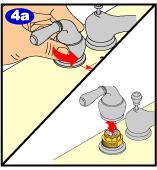
To remove the cartridge from your faucet assembly, first hold the handles steady and unscrew the handle hub counterclockwise. Once the handle hub is loosened completely, pull the handle off the valve assembly.
|
 |
|
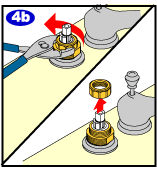
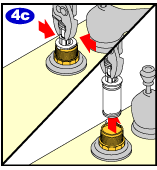
Then, loosen and remove the nut from the cartridge using pliers.
|
 |
|
Cartridge Removal
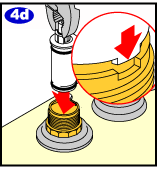
You are now ready to remove the old cartridge. With pliers, grasp the cartridge stem and pull it directly up out of the valve assembly.
|
 |
|
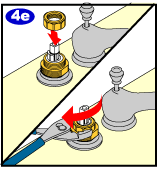
Discard the old cartridge and insert the new cartridge into the valve assembly. Make certain that the notches line up as indicated.
|
 |
|
Cartridge Reassembly
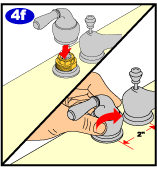
Reattach the nuts to the valve assemblies and tighten them with pliers.
|
 |
|
Finally, replace the handles and secure them by tightening the handle hubs.
|
 |
|
Disassembly
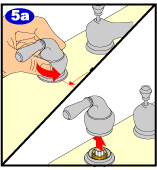
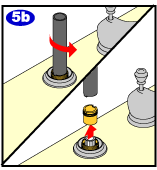
To remove the cartridge from your widespread faucet assembly, first hold the handle steady and unscrew the handle hubs counterclockwise. Once the handle hubs are loosened completely, pull the handles off the valve assembly.
|
 |
|
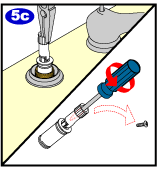
Then, using tool #14272 (which is not included), loosen and remove the cartridge nut.
|
 |
|
Cartridge Removal & Reassembly
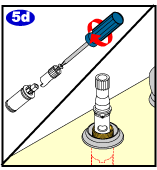
You are now ready to remove the old cartridge. Grasp the cartridge stem with pliers and pull the cartridge straight up out of the valve assembly. Using a Philips head screwdriver, unscrew the stem extension.
|
 |
|
Reattach the stem extension to the new cartridge. Insert the new cartridge assembly into the valve assembly. Using light pressure, turn the assembly until it locks into place.
|
